Creating an AWS Lambda Kotlin function

Twitter bot with Kotlin in AWS (7 part series)
This article is part of the Twitter bot with Kotlin in AWS series showing how I created a Twitter bot for Vue 3 updates. But this article works as an independent article on how to create a Lambda function in Kotlin.
You could manage your AWS Lambda functions in the browser AWS console. But I'm going to use the AWS CLI as I believe that leads to less manual work.
AWS setup
- You need to create an account and sign in to the AWS Management Console
- Create an Administrator IAM User. Remember to copy the AWS Access Key ID and AWS Secret Access Key for later use.
- Create a role and select AWS service and Lambda. Give permission to the resources the Lambda function is going to need. I have given permission to CloudWatch Logs, DynamoDB, and Secrets Manager.
Setting up the AWS CLI
Install the AWS CLI to your computer and verify it is installed by running aws --version in your terminal.
Now you need to configure the CLI by using the IAM user created previously. Run aws configure in your terminal and enter the AWS Access Key ID and AWS Secret Access Key, region name (available codes can be found here) and output (json, yaml, text or table) where I use json.
Kotlin Project
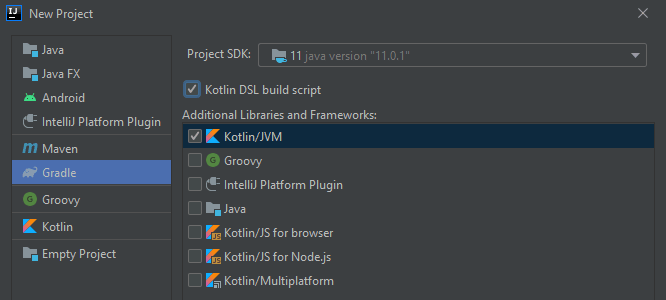
I'm using IntelliJ as my editor. Now go ahead and create a new project and select gradle, Kotlin DSL build script (not required), and Kotlin/JVM.
Create file Main.kt that will hold the function we want to deploy to an AWS Lambda function.
class Main {
    fun runLambda() = "Hello World"
}
We need to make sure that our .jar file which we are going to upload will be a fat jar, containing all our dependencies, by altering the build.gradle.kts file and adding this to tasks. We can also change the filename if we want.
jar {
    archiveFileName.set("twitter-bot-vue-3.jar")
    from(configurations
        .runtimeClasspath.get().files.filter { it.exists() }
        .map { if (it.isDirectory) it else zipTree(it) })
}
Deploy to AWS
Build .jar:
gradlew build
Create Lambda function (For the role parameter, you can copy the Role ARN from the setup):
aws lambda create-function --function-name twitter-bot-vue-3 --zip-file fileb://build/libs/twitter-bot-vue-3.jar --runtime java11 --role arn:aws:iam::<account_id>:role/<role> --handler Main::runLambda --timeout 15 --memory-size 512
aws lambda update-function-code --function-name twitter-bot-vue-3 --zip-file fileb://build/libs/twitter-bot-vue-3.jar
aws lambda invoke --function-name twitter-bot-vue-3 output.txt
Now go ahead to check the output.txt file to see if our function ran correctly.